Home > Working with Planning Projects > Building an Application > Deployment and Workflow > Deploying Models for Input and Review
Deploying Models for Input and Review
Last Updated 3/11/2012 8:53 PM
Deployment is the term used to describe the process of making certain slices ('spreadsheets') of a model available to other users for data input or review. The models within a project are initially only visble to the owner of the project. The project owner can however provide access to selected portions of the model to other users through Deployment.
To specify how you wish to deploy models to other users go to [projectname]->Modeling->Deployment and the Deployment screen will appear:

In the top left corner of the screen a drop down list allows us to select the model we are defining deployment for. Next to it is a dropdown list which will show the dimensions available to be used as the deployment dimension. Select the model you are sepcifying the deployment for and specify which dimension you wish to use as the deployment dimension.
The member hierarchy for the selected dimension will be displayed (in collapsed format) in the main window. Can expand each section of the hierarchy by clicking on the  icon next to the node you wish to expand. Once a node is expanded its icon will change to the icon next to the node you wish to expand. Once a node is expanded its icon will change to the  icon. Clicking the icon will cause the node to collapse (i.e. all its child members will disappear) and the icon will change back to the icon again. icon. Clicking the icon will cause the node to collapse (i.e. all its child members will disappear) and the icon will change back to the icon again.
You can also expand or collapse all branches in the hirerachy by right clicking any node of the hierarchy displayed and then selecting either 'Expand All branches' or 'Collapse All branches'.
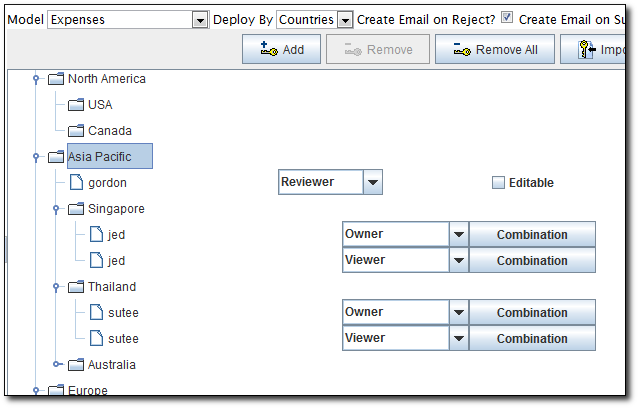
In the example below, we have selected the 'Expenses' model, and the 'Countries' dimension, and have expanded all branches of the 'Countries' dimension:
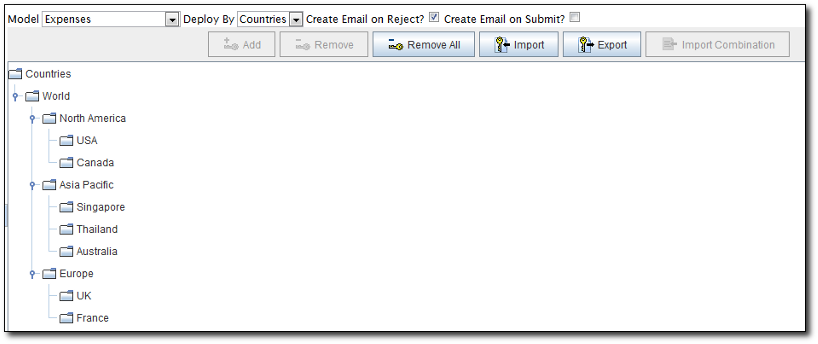
The menubar across the top provides functions which enable user access rights to be added or removed, and also includes functions for importing user access rights from external files. The function of each of these is described below:

|
The Add button initiates a wizard to add access rights for a user for the currently selected node. |

|
The Remove button removes the currently selected user access right. |
|
The Remove All button removes all user access right. |

|
The Import button prompts for a file containing deployment rights. The format for the import file is described in more detail later in this section |

|
The Export button will export the currently defined deployment rights to an external text file (same format as Import above) |

|
The Import Combination will import combinations from an external file. |
Types of User Access Rights
We can apply a number of different access rights which will vary by user and also by type of node. Certain access rights can only be applied at an input or leaf (base) level, whereas other access rights can only be applied at branch (consolidated) level. The following table describes each access right and its characteristics.
|
Access Right
|
Description
|
Available
at Leaf Level
|
Available
at Branch Level
|
Can be assigned
to more than one
user for a specific
node/combination
|
| Viewer |
User can view the specified combination but cannot modify contents. |
Yes |
Yes |
Yes |
| Owner |
User can view the specified combination and can modify contents (non - calculated measures only). |
Yes |
No |
No |
| Measure Modeler |
User can extend measure logic for the specified combination. For more details on using this function, see Using Measure Modeler. |
Yes |
No |
No |
| Node Modeler |
User can add new nodes below the leaf level assigned to them. For more details on using this function, see Using Node Modeler. |
Yes |
No |
No |
| Reviewer |
User can view and review data submitted by an owner, and has the ability to reject a submission, and submit to the next level in the hierarchy. Editing of data can be enabled for Reviewer. |
Yes |
Yes |
No |
| Approver |
User can view and review data submitted by an owner/reviewer, and has the ability to approve/reject a submission. |
Yes |
Yes |
No |
Adding Access Rights for a User
Giving a user access rights through the user interface is a straightforward process, and involves the following steps:
- Select the node you wish to add user access rights to
- Select the user you wish to add the access right for
- Select the typ of access right you wish to assign
Given our 'Expenses' model example above, which we wish to deploy by 'Countries', let's look at adding the following User Access Rights:
- Assign Owner rights for Singapore CY Budget to user Jed
- Assign Viewer rights for Singapore CY Actual to user Jed
- Assign Owner rights for Thailand CY Budget to user Sutee
- Assign Viewer rights for Thailand CY Actual to user Sutee
- Assign Reviewer rights for Asia to User Gordon
First step is to select the 'Expenses' model as the one we wish to deploy, and select 'Countries' as the deployment dimension, and then we will expand the 'Countries' hierarchy, so that we can see the full 'Countries' hierarchy (as in th screen image above).
Next we will set the rights for user Jed for Singapore.
Select the 'Singapore' node, by clicking it once. The node should be highlighted in blue.
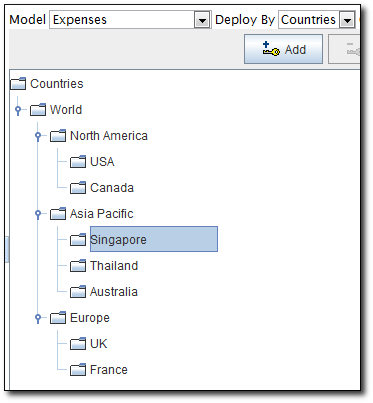
Next click the button, and a popup dropdown list will appear from which you can select the user. We will select user Jed.
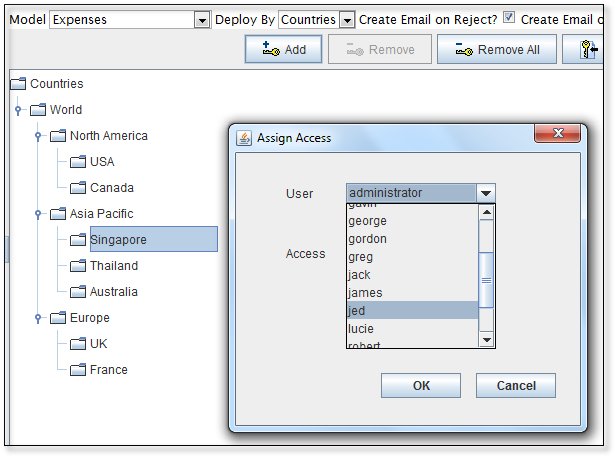
After we select user Jed, we will select 'Owner' from the Access drop down list which shows the access rights available for this node. .

Once again select OK on the popup window to confirm the user and access right.
The deployment screen should now show that user Jed has owner rights assigned to him.
You will see that next to the rights there is a  button. This allows us to specify which spreadsheet(s) or combinations, will be assigned to the user with 'Owner' access rights. button. This allows us to specify which spreadsheet(s) or combinations, will be assigned to the user with 'Owner' access rights.
Note that if we do not define any combinations, then all combinations will be selected.
To specify the combinations, we click on the button, and a popup list will appear showing the available combinations.
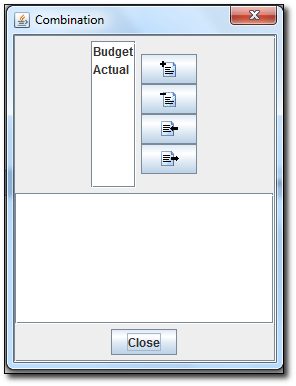
In the case of our 'Expenses' model, there is only one dimension 'Versions' to select from, since 'Countries' being our deployment dimension is already selected.
Since we are defining 'Owner' rights for 'Budget', we select that member, and click on the  button. The selected member will appear in the frame in the lower portion of the popup. See Defining Combinations below for details on the other buttons used for defing combibations. button. The selected member will appear in the frame in the lower portion of the popup. See Defining Combinations below for details on the other buttons used for defing combibations.
We then click on the  button to save the combinations. button to save the combinations.
We then perform the same steps to add 'Viewer' rights for 'CY Actual' for Jed, by clicking the button again (we don't need to select 'Singapore' as it should still be selected from the previous selection), and this time specifying the 'Viewer' rights.
After setting the access rights for user Jed, we can then set the access rights for user Sutee in the same manner, but first selecting the 'Thailand' node.
And finally we set 'Reviewer' rights for Asia for user Gordon. Note that when we set 'Reviewer' rights we do not define a combination. There is no need for this since a 'Reviewer' does not have any input rights, and it is assumed that the 'Reviewer' will have access to all combinations under node 'Asia'. However, if the editable option for 'Reviewer' is turned on, the 'Reviewer' will be able to edit data that is submitted to him.
Once completed, the deployment screen should look like this:
Note that it is not necessary for us to define deployment for every node. We can add the deployment for 'UK' and 'France' nodes later. This is very useful since we can deploy certain slices for users to start working with, even though we may not have decided who is responsible for the other slices.
Once we have defined all the necessary access rights, we must then click the  to save our deployment settings back to the server. This will also create the necessary workflow for our 'Expenses' model automatically. to save our deployment settings back to the server. This will also create the necessary workflow for our 'Expenses' model automatically.
Defining Combinations
Selecting combinations when defining user access rights for 'Viewer' and 'Owner' modes, allows the project owner to restrict the specific 'spreadsheets' that can be viewed or updated. In the example above our model only has one dimension (other than the Version, Period and Measure dimensions), and since we need to define at least one dimension as the deployment dimension, the only spreadsheets that can be defined are for each Version.
Each combination or slice always includes all Measures and all Periods.
The combinations popup that appears when you click on the button, will display any additional dimensions to the left of the Versions dimension. You can then specify the combinations from each dimension list. If nothing is selcted for any dimension list, then the default is assumed to be all members.
Only the combinations listed in the lower window when you click on the button
The action buttons available in the combinations popup are as follows:
Using Combinations Import and Export
The file format for a combinations file is very simple. It is a text file with the selected members for each combination separated by the '|' symbol.The order of the dimensions must be the same as the order defined in the combinations popup. Each dimension member must be specified (all members in a dimension can be specified with '{all}').
When importing from a file, any combinations will be added to those already selected. The import does not check if the combination already exists in the selected combinations window, so any duplicate entries resulting from the import must be removed manually.
When exporting combinations, the default extension will be .csv (comma delimited). To overide this, change the file type to include all file types, and type the file extension into the filename.
The following combinations example is for our 'Revenue' model which has dimensions 'Division', 'Countries'. The 'Division' dimension is our deployment dimension, and so to define a combination slice for any specified node in 'Division', we need to specify each dimension (basically 'Countries' and 'Versions'),and the following example defines 'CY Budget' for 'London' and 'Thailand', and all countries for 'CY Actual'.
London|CY Budget
Thailand|CY Budget
{all}|CY Actual
Importing Deployment Definitions
Adding and managing deployment using the interface is fine for small numbers of users, but adding deployment rights for 50 or a 100 users can be time consuming and tedious. The Deployment module allows you to import details of which nodes, access rights and combinations are assigned to each user.
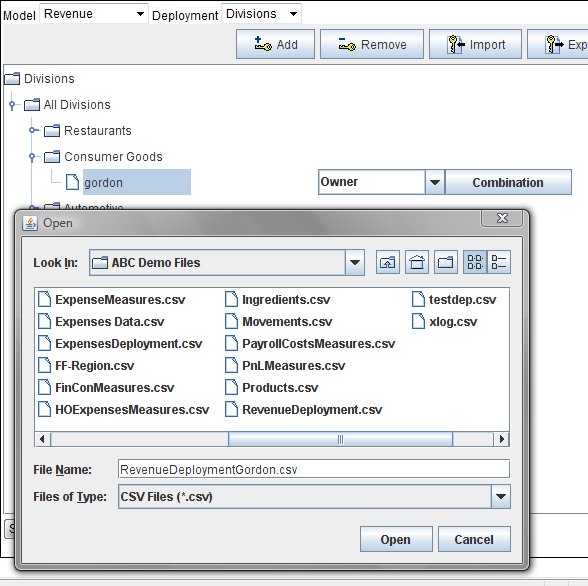
Selecting the button wil open a file dialog so that you can select a file containing the deployment details to be imported.
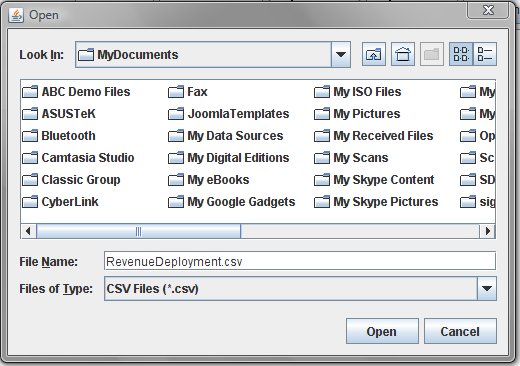
The format of the import file is a comma delimited format (.csv), and contains the following information:
| Column 1 |
Node |
The node (of the deployment dimension) these rights apply to. |
| Column 2 |
User |
The user name for the user you wish to assign rights to (must be an existing registered user). |
| Column 3 |
Access Right |
The access right you wish to assign to the specified user. |
| Column 4 |
Editable |
Optional. Only applicable to Reviewers. Indicates if editable option is activated. True for activated, False for unactivated. |
| Column 5 |
Combination |
Optional. Specifies the combinations you wish to define for this access right for this user. Combinations are specified as described above in Using Combinations above. Each combination is listed after the other with a comma separator. |
The following is a sample import file for our 'Revenue' model:
Restaurants,lucie,Owner,false,Singapore|CY Budget,Thailand|CY Budget
Restaurants,lucie,Viewer,false,Singapore|CY Actual,Singapore|LY Actual,Thailand|CY Actual,Thailand|LY Actual
Automotive,jack,Owner,false,{all}|CY Budget
Automotive,jack,Viewer,false,{all}|CY Actual,{all}|LY Actual
After import:
- Lucie, will have Owner rights to CY Budgets for Restaurants in Singapore and Thailand,and she also have Viewer rights to CY Actual and LY Actual for Restaurants in Singapore and Thailand.
- Jack will have Owner rights to CY Budgets for Automotive in all Countries, and will also have Viewer rights to CY Actual and LY Actual for Automotive in all Countries.
Note that any deployment rights imported are in addition to existing deployment, but the import function will not overwrite or change any existing deployment. So for example if we already have Owner rights assigned to Jack for Automotive, CY Budget and we import a different Owner combination for Jack for Automotive, the current definition will remain and the import entry will be ignored.
Exporting Deployment Definitions
It is possible to export any deployment definitions you have already defined and saved using the button. As with the import option you will be prompted to enter a file using a file dialogue.
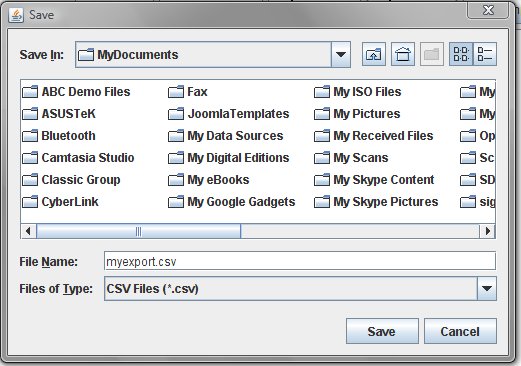
After entering a file name into the dialogue, and clicking Save, the current deployment rights and associated combinations will be saved to the specified file in comma delimited format, and can be imported back into the system later if required.
Importing Combinations
Combinations can be imported from the deployment screen. If you have already created the user access rights, you can highlight the user access line you wish to import the combinations for and then click on the button. You will be prompted for the filename containing the combinations, and when you click to open the file, the combinations for that user/node/access right will be loaded. The format of the combinations file is the same as defined above in Using Combinations Import and Export.
See also
| 


 Page URL: